When you’re migrating your WordPress website to another domain or hosting provider that is using cPanel, using the Installatron feature is the easiest way to get it done.
PRO TIP: This process requires that your site still be accessible via your URL.
If you are migrating to a new hosting account, you’ll need to first setup cPanel, which your hosting provider should have a tutorial for.
If you’re migrating your WordPress site to an existing cPanel account, you’ll need to first setup the “Addon Domain”. Which is where this tutorial will start.
Done-For-You Service
Want us to fix it for you!? If you don’t want to waste time with these tech issues, we’re happy to do-it-for-you! You can feel confident knowing you’ve got an expert fixing it for you!
Step 1: Add your domain to cPanel
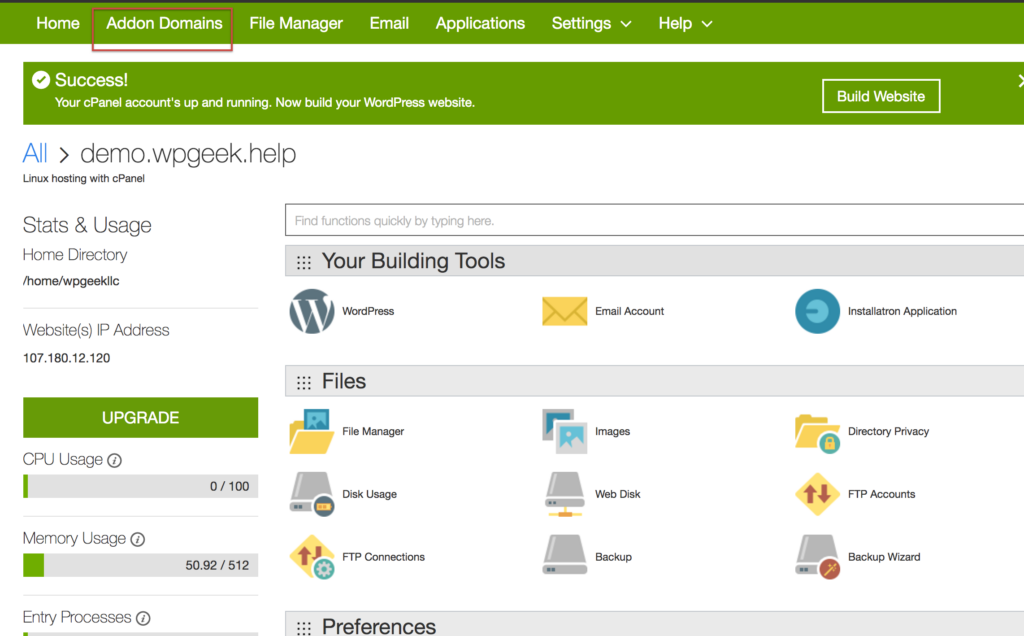
These steps are depicted below…
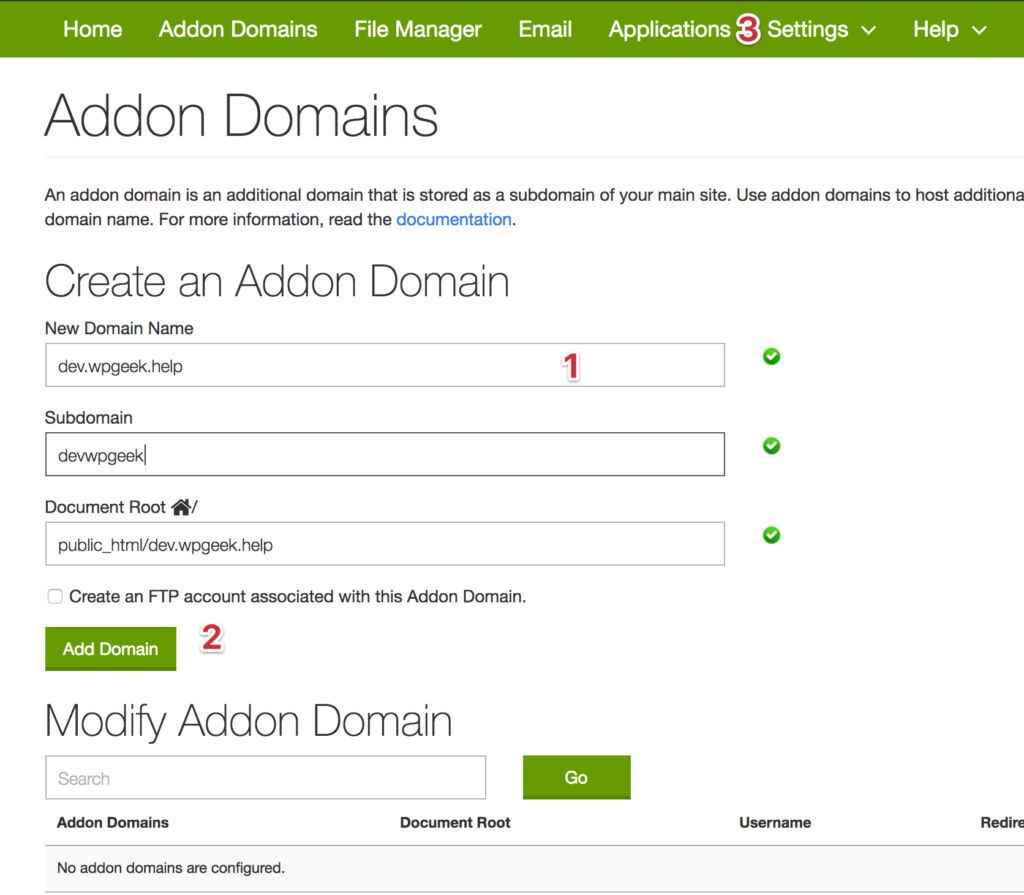
- Enter your domain name (no www.)
- subdomain will auto populate
- Document Root will auto populate
- Click “Add Domain
- Click “Applications” in the top green bar
Step 2: Migrating your WordPress site with cPanel Installatron
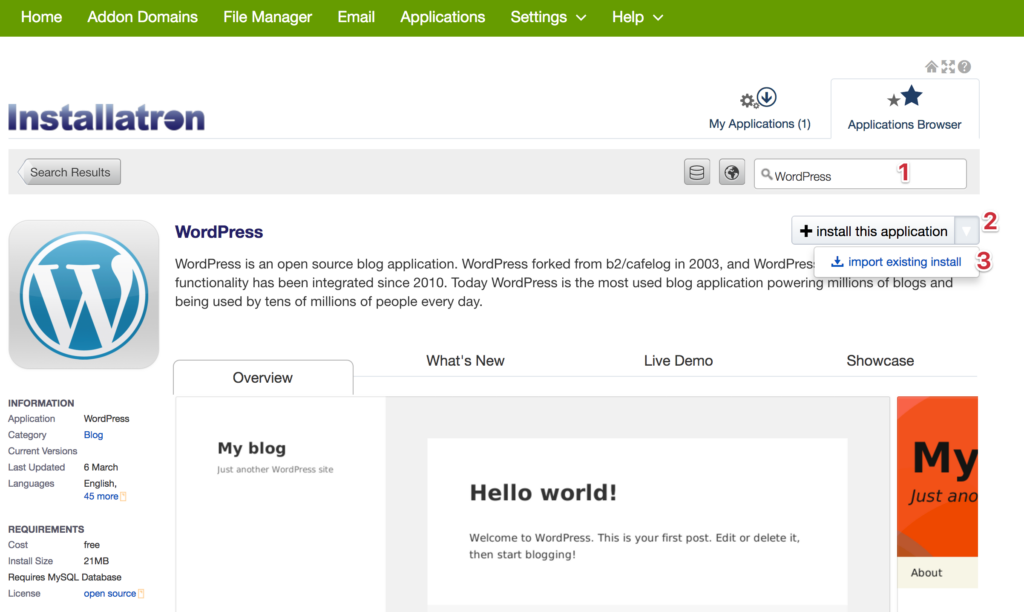
- Type in “WordPress” in the search box and press enter
- Click on the down arrow
- Click on “Import existing install”
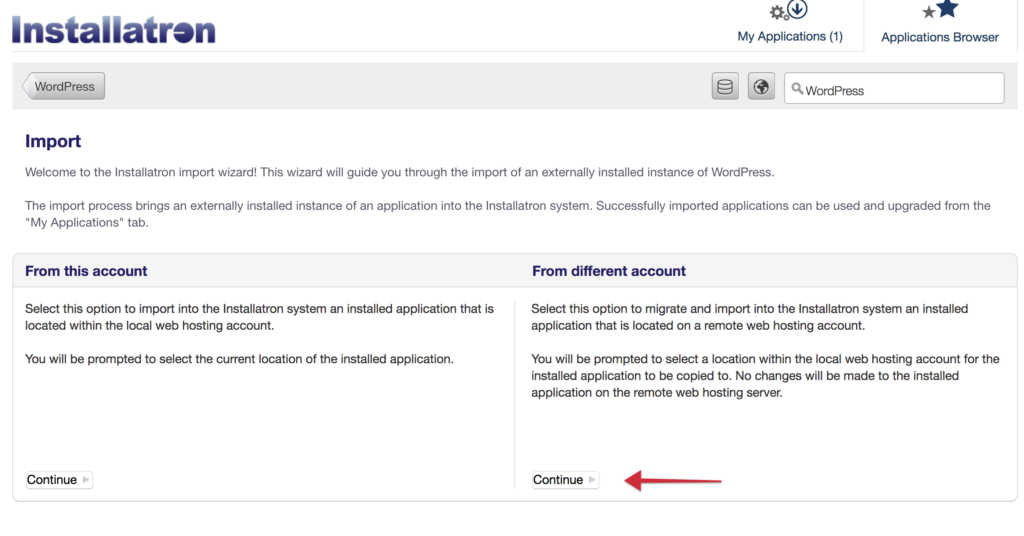
- Click “Continue” under the “From different account” section
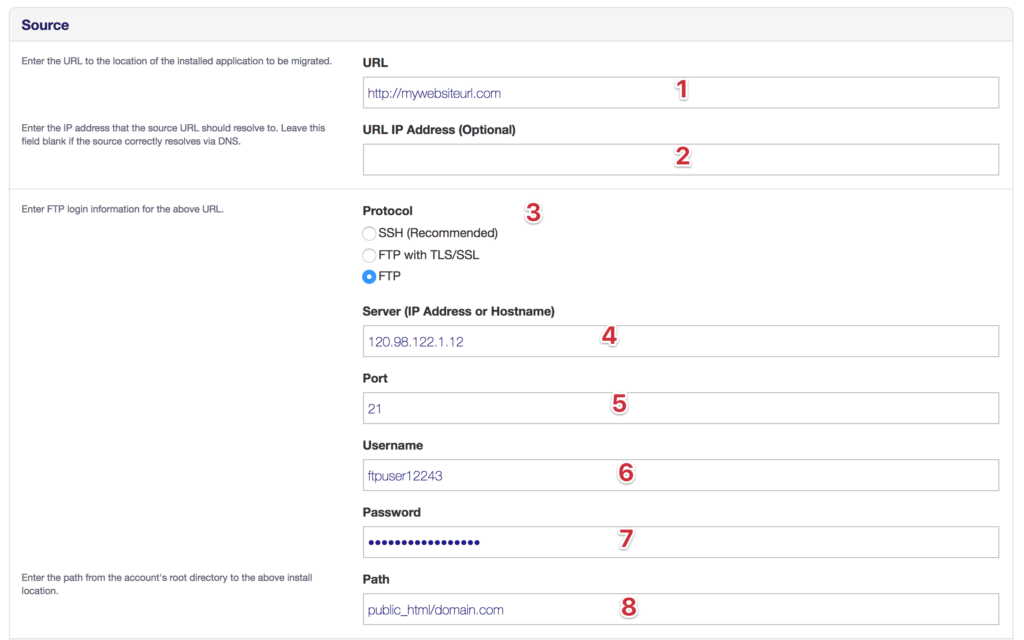
Step 3: Enter your FTP info for your current host
This information all comes from the hosting provider where you are moving your website from.
- Site URL – where your site is currently
- Options, can be left blank
- Select FTP (unless otherwise specified by your hosting provider)
- The IP address for the hosting account you are moving from
- Port 21 (unless otherwise specified by host)
- FTP Username
- FTP Password
- Path: this is the direct path to your website files on your hosting account
For help with any of these steps you’re unsure about, use the comments on the page or call your hosting provider.
Step 4: Select where to move your website too
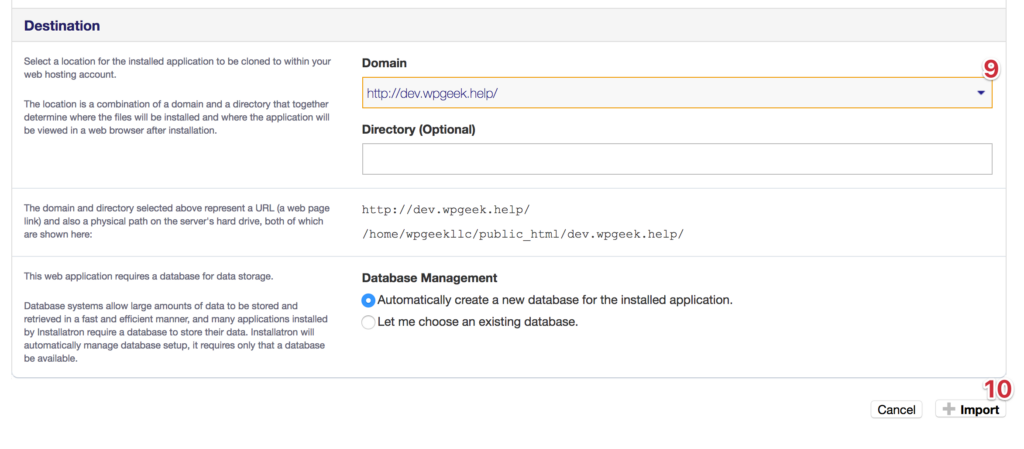
- In the drop down, select the domain you added in step 1.
- Make sure the “Directory” field is blank (very important)
- Click “Import”
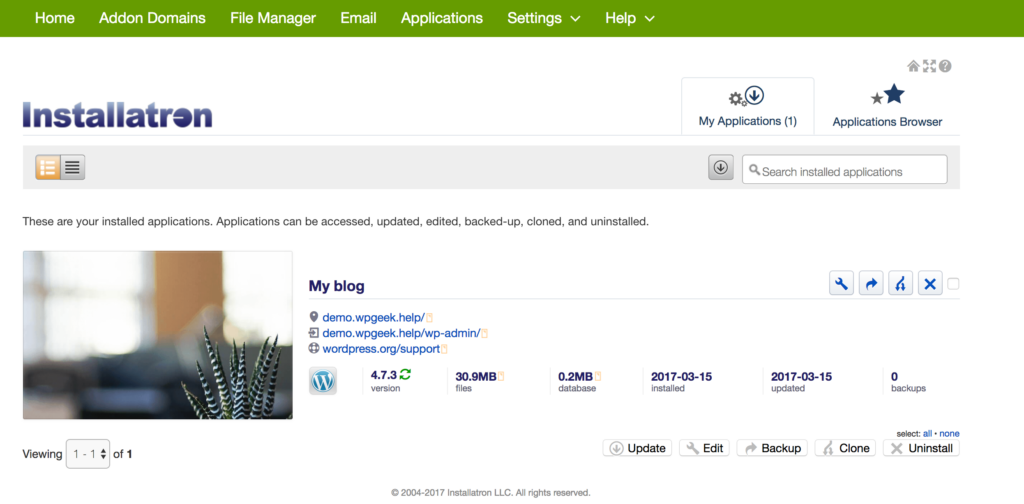
Once the install is complete, you will see your installation on your “My Applications” tab as shown below!
Wrapping this Up!
That’s it. As long as all the info was entered correctly you should see a successful migration.
If there are errors, read them carefully and double check your inputs.
If you continue to have issues, try deactivating your plugins and changing your theme to one of the 20 something themes.
Done-For-You Service
Want us to fix it for you!? If you don’t want to waste time with these tech issues, we’re happy to do-it-for-you! You can feel confident knowing you’ve got an expert fixing it for you!
Always feel free to use the comments below for additional assistants!
